
The top questions my students ask me is “Why did you choose those camera settings?” and “How do you know what camera settings to choose?” These are common questions that new photographers have. You look at a photo, and you want to understand the photographer’s settings.
Why did that photographer choose specific settings? I say it in the Beginners Photography Essentials class, on my FB Lives, and in my classes every day…You are an artist, and your vision for your art will help you choose the settings, but hopefully, this blog should give you a starting point on your camera settings but don’t forget to check out the Beginners Photography Essentials class, as it will help make choosing your settings second nature.
3 Examples of Camera Settings
Camera Settings-Wide Open Aperture
I am a natural light portrait photographer. I do not use any light sources, and I love to capture the essence of my subject, which is why I chose the settings that I did with this shot.
I wanted this photo to be all about her. No background, nothing to distract from my subject. I shot this inside my home, using a wide-open exposure to get a buttery background blur so that the viewer’s focus went directly to the subject. And aperture is the setting I use to achieve this.
It was taken close to a window to get that beautiful natural light, and I angled my subject for a flattering pose.
This was taken with my 50mm lens, my favorite as I can achieve crisp photos with a wide-open aperture.

Camera Settings
Aperture-1.8…I chose the aperture to create the blur in the background making the subject stand out. You can see that her necklace and even her earrings aren’t in focus due to the wide-open aperture. I wanted the viewer to focus on her eyes.
SS-1/165…The shutter speed doesn’t need to be any faster as the subject is stationary.
ISO-200…The strong light coming through the window allowed me to use a lower ISO. I chose to go to 200 because I wanted a very bright exposure on the shot.
Camera Settings-Mid Range Aperture
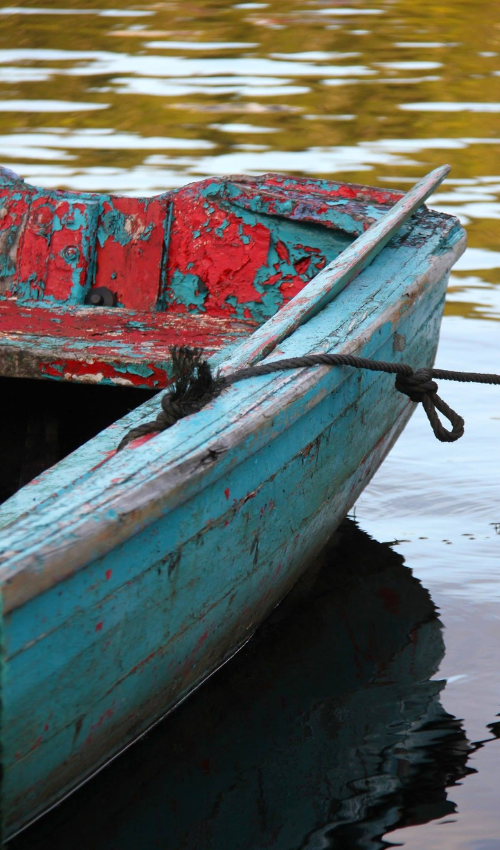
For this photo, I wanted the focus to fall midway on the boat, with the majority of the foreground clear and the background blurry. I wanted the viewer’s eye to fall on the red paint near the back of the boat.
This was on an overcast day, and the only movement of the boat was due to the movement of the water.
Camera Settings
Aperture-5.6…I chose the aperture to ensure that the boat was in focus and the focus blurred on the water in the background. The viewer’s eye is drawn down the line of the boat to the red paint at the back.
SS-1/250…This shutter speed was chosen due to the movement of the boat due to the waves.
ISO-200…Although it was an overcast day, light coming through the clouds allowed me to use a lower ISO. I chose to go to 200 because I wanted a very bright exposure on the shot.
Camera Settings-Narrow Aperture
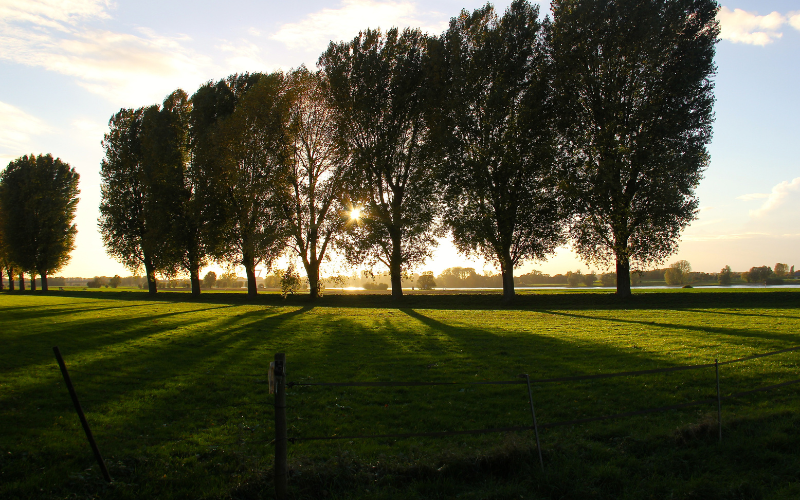
I knew that with this shot, I wanted to capture the whole scene and that I wanted it to all be crisp and clear. I love how the light is coming through the trees and glimmering off of the trees, and I knew that I would need to shoot a narrow aperture to achieve a sharp focus on that.
Unlike the first shot, I needed to make sure that the aperture was stopped down enough to capture focus on the whole scene, as I wanted the viewer to “stay” in the shot and notice all of the details.
Camera Settings
Aperture-11…I chose the aperture to ensure that everything in the shot was crisp and clear. I wanted the viewer to catch all of the details in the leaves and background of the shot.
SS-1/200…The shutter speed doesn’t need to be any faster as the subject is stationary.
ISO-200…The strong light coming through the trees allowed me to keep the ISO low.
If seeing these examples has been helpful and you are ready to learn more about how and why to choose settings, make sure you come to join the thousands of other students I’ve taught to do just that in The Beginners Photography Essentials Class or grab my free Exposure Triangle Cheat Sheets to get started.


