Capturing Stunning Spring Photography
Spring is here and it is a fantastic season for photography, with its long daylight hours and warm, vibrant colors the stunning spring photography options are endless.
Learning to use the spring light correctly will make your photographs go from mediocre to absolutely amazing!
Once you learn how to use the light, it is not that hard; it just takes practice. Pick a weekend, follow these tips to master spring light, and start using that light to capture all of the beautiful spring photography possibilities!
Understanding Natural Light
The first step in great spring photography is understanding the difference between hard and soft light.
Hard light creates sharp shadows. There is a hard contrast to this light. It is the light produced on a bright sunny day with almost no clouds in the sky. The smaller the light source, the stronger the light.
Soft light is more gentle, soft, and understated. It is the light that comes when the sun is diffused through the trees or is lower in the sky. Soft light’s transition is much more subtle and delicate and tends to be much more flattering than hard light.
When learning the light, soft light is by far the easiest to use. It softly falls over your subject, almost wrapping them in light and it’s easy to find in the springtime.
Shooting early in the morning, the blue hour, which occurs just before sunrise will help you to capture rich warm light or capture the light of the sunrise as it just breaks the horizon.
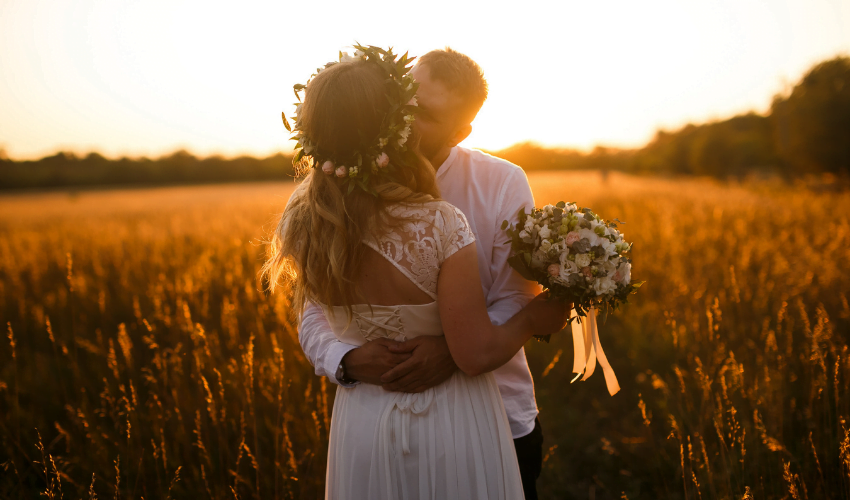
The golden hour is another great time to shoot. The golden hour, occurring shortly after sunrise and before sunset is a magical time for photography. During spring, the golden hour bathes the landscape in warm, soft light. The light is magical…soft, warm and golden. It wraps itself perfectly around your subject
Play with shadows and textures, as well as silhouettes during both the morning hours and the golden hour.

Utilize Natural Light Techniques for Spring Photography
Utilizing Natural Light Techniques for spring photography is all about exploring different ways to leverage natural light to capture stunning spring photographs.
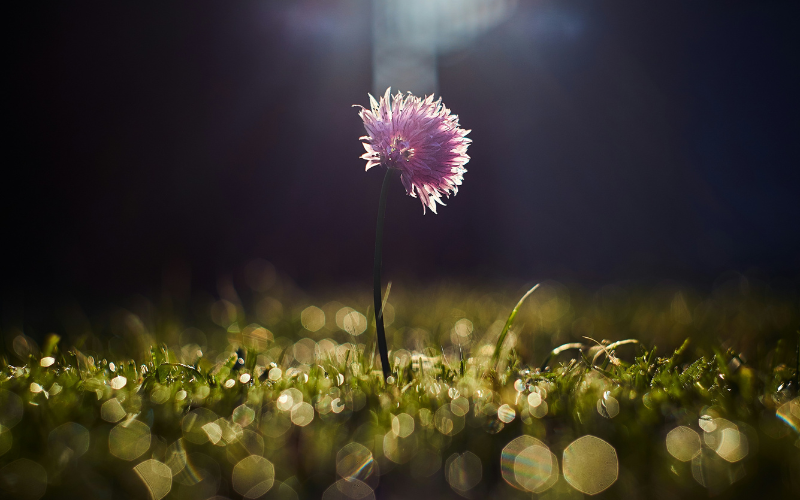
Utilize backlighting. Backlighting involves positioning your subject with the sun directly behind them. This technique creates a beautiful halo effect around your subject, highlighting their outline and adding a sense of warmth to the image.
In spring, backlighting can be particularly effective when shooting subjects like flowers, leaves, or even portraits outdoors. Experiment with different angles to achieve the desired effect, and consider using a lens hood to prevent lens flare.
Play with frontlighting. Frontlighting occurs when the subject is facing the sun, receiving direct illumination. This technique provides even lighting across the scene, resulting in clear and vibrant images.
During spring, when the sun is not as harsh as in summer, frontlighting can produce soft, flattering light ideal for portraits or capturing the details of blooming flowers. Be mindful of harsh shadows and adjust your positioning or use reflectors to fill in shadows if necessary.
And take advantage of side lighting. Side lighting involves positioning the subject perpendicular to the direction of the sunlight. This technique creates a play of light and shadow, adding depth and dimension to your photographs.
In spring, when the sun is lower in the sky, side lighting can produce dramatic effects by casting long shadows and highlighting textures. Experiment with different angles to find the most flattering light for your subject, and consider using a diffuser to soften harsh shadows if needed.

Enhance Your Spring Photography
Focus and use practical tips and techniques to elevate your spring photographs beyond just relying on natural light.
Utilize reflectors. Reflectors are invaluable tools for manipulating natural light and enhancing your spring photography. They bounce sunlight onto your subject, filling in shadows and adding warmth to your images. They diffuse the light and make it soft and warm on your subject.
Reflectors can help you achieve a flattering, evenly lit look, especially for portraits. Experiment with different reflector colors to achieve different effects, such as silver for a cooler tone or gold for a warmer tone. Position the reflector opposite the direction of the sunlight to bounce light onto your subject effectively.
Diffusers are one of my favorite tools. Diffusers are essential for softening harsh sunlight and creating a more flattering light for your spring photographs. They work by scattering and diffusing sunlight, reducing harsh shadows and creating a soft, even glow.
For your spring photography, when the sun is still relatively low in the sky, diffusers can help you achieve beautiful, naturally lit portraits and capture the delicate details of blooming flowers without the harshness of direct sunlight.
Position the diffuser between your subject and the sun to soften the light effectively, and consider using a larger diffuser for broader coverage.
And to make your photos look like professional images and not snapshots, make sure to utilize composition.
Composition plays a crucial role in creating compelling photographs. Pay attention to the elements of the spring landscape, such as blooming flowers, fresh foliage, and vibrant colors, and incorporate them into your compositions to add interest and depth. Experiment with different angles, perspectives, and framing techniques to highlight the beauty of spring and tell a compelling visual story. Consider using leading lines, framing devices, and the rule of thirds to create balanced and visually appealing compositions that draw the viewer’s eye into the scene.

I’ve explored various techniques and tips for harnessing the magic of spring and elevating your spring photography to new heights.
From understanding the qualities of spring light to utilizing techniques like backlighting, frontlighting, side lighting, and making the most of golden and blue hours, you now have a comprehensive toolkit to create captivating images that embody the spirit of the season.
Remember when you are shooting spring photography-embrace experimentation and creativity. Allow yourself to explore different angles, perspectives, and compositions, and don’t be afraid to play with shadows and light to capture unique and captivating moments.
Whether you’re photographing blooming flowers, lush landscapes, or joyful moments of life, let the beauty of spring guide your vision and inspire your creativity.
And if you are ready for even more tutorials, tips and resources to improve your photography, sign up for the Behind The Lens Newsletter!


